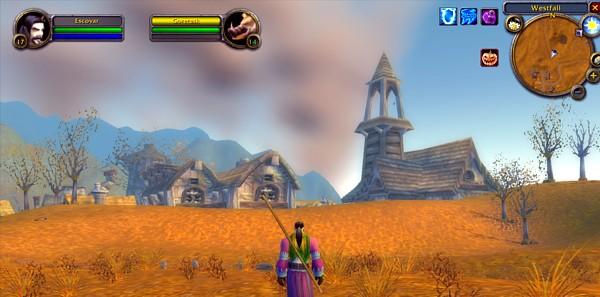
Once on the list, I needed to get to Moonbrook, which lies south of Sentinel Hill. You can work a series of quests to find out where the entrance to the Deadmines lies, or you can just ask someone, or you can look for the very visible spire shown in the image below.
Once in Moonbrook, you need to go to the southwest corner of the village to look for a large building (shown below).

There's a meeting stone just southwest of the building that's a bit of a giveaway, too.
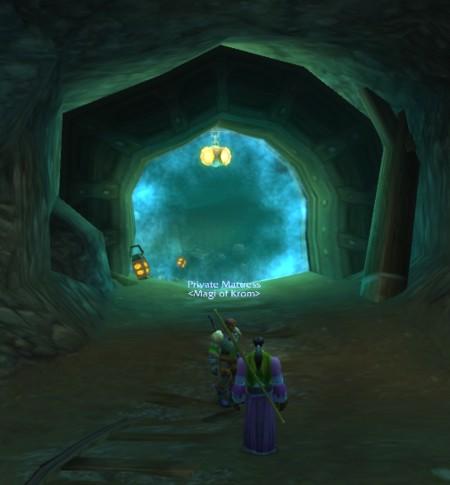 Once you get into the mines themselves, you'll need to work your way west, taking turns as needed until you find the Instance, seen in the image to the right. Once you go through the shiny circle, monsters stay dead when you kill them, and you'll stop seeing adventurers who aren't members of your party.
On your way to the entrance, you'll pass a "fork" in the tunnels where you can turn right or go across a bridge into an area that looks blue or purple on your mini-map. I unfortunately forgot to grab a screencap of this point; I'll update this article if I remember it on a future pass through the dungeon. This off-color area is where you'll find the Miners' Cards you need to complete the Collecting Memories quest. You'll also find undead monsters in fairly dense clusters that can be hard to fight. Best have a full group just to work this area, since crowd-control spells like Polymorph don't work on undead.
 The Deadmines are a fairly straightforward dungeon. Side paths generally lead to dead ends pretty quickly, so you won't have much trouble finding your way to the key encounters. The first Boss you'll encounter will be Rhahk'Zor the Foreman, a large ogre. I saw stunning effects from the warriors work on him, but I remember he was immune to something I tried as a hunter; maybe it's poison that doesn't work. Anyway, with two fighters and a druid in bear form holding his attention, a priest keeping them health, and a steady stream of Arcane Missiles from me, he went down without much difficulty. There are a couple of Overseers in the same room where he waits, but if you pull him when he's close to the entrance, you shouldn't have to fight them at the same time.
Important safety tip: Defeating Rhahk'Zor apparently releases a patrol, consisting of an Overseer and a spellcaster (I forget what they're called). I'm not entirely sure whether they're triggered or simply pop up on a regular schedule, but their arrival time is pretty suspicious. It's a good idea to go back and kill them, since they'll generally arrive just in time to hit you in the back about the time you're fighting the next boss if you don't.
Past Rhahk'Zor, you'll soon find yourself in the Lumber Room, where Lumbermaster Sneed lurks in his giant Shredder machine. Sneed and the Shredder are the objects of a quest that you can get in the Dwarven District of Stormwind. Make sure your group shares all of their quests before you get to this point in the dungeon.

This guy can be pretty harsh. The Shredder is heavily armored and does a lot of damage. There are also a lot of other goblins in the room, and you don't want to be fighting them at the same time you're fighting the Shredder, so you should pull them out and kill them first. Beware when you bring the Shredder down; Sneed will fall out and start attacking you in just a moment, and he's not a weakling, either.
Again, lookout for the patrol before you move on.
Past the Lumber Room, you'll follow a tunnel to the Smelter. This room has a long spiral ramp leading down to a lower floor, and you'll find Gilnid the Smelter himself at the bottom.
The monsters here are goblins engineers who either throw firebombs or shoot guns. The gunners will also drop little golems that will run up to attack you. If you pull more than one or two of these guys, you can find yourselves overwhelmed surprisingly fast. There are also rooms hidden under the ramp where more goblins lurk, and they'll come out if you move on to the central platform at the bottom; that's how we pulled too many goblins and got wiped! Stick to the outside wall when you come down the ramp and minimize the number of goblins you have to fight at once.
Again, lookout for the patrol.
Past the smelter, you'll follow the tunnel down to a large door with a cannon pointed at it. Somewhere along the way you have to pick up the charge to prep the cannon for firing. I've never been the one who picked that item up, so I don't know where you get it, but I suspect that it's near impossible to get that far without someone in your party picking it up. Whoever has it needs to fire the cannon.
Beyond the blasted door, is the secret dock of the Defias Pirate Battleship. You can fight your way down the dock, or you can do what we did on this trip: follow the coast around toward the other end of the dock, then swim across to it.
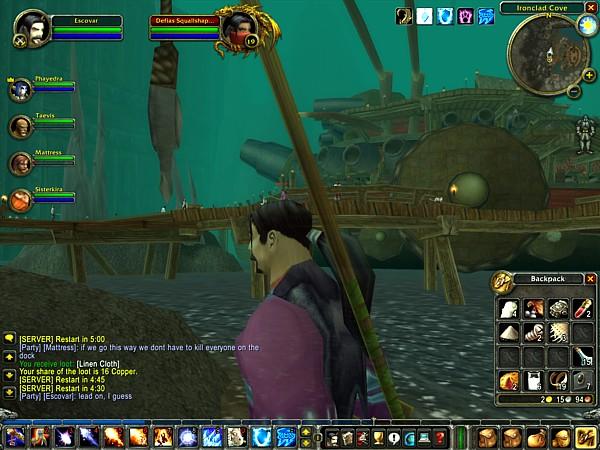
You'll have to fight a few goblins, but you may find that preferable to fighting your way through all the pirates. I think we only tried the end run because we were running out of time (see below).
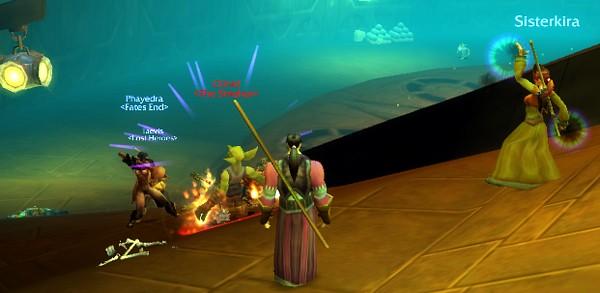
At the end of the dock, you'll reach the boarding plank to the pirate ship, which is guarded by Mr. Smite.
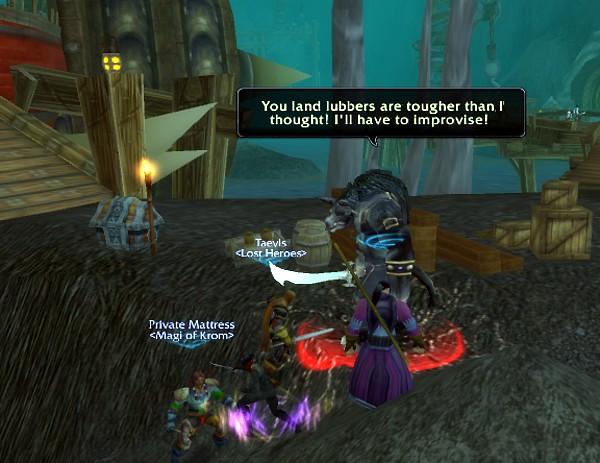
As you can see, Mr. Smite is a large Tauren warrior. A couple of Defias assassins (I don't remember exactly what they're called) will join him when he starts fighting you. He'll start with a single one-handed weapon, but after taking a certain amount of damage, he'll use an enhanced version of the Tauren "War Stomp" to stun your entire party. This is annoying, because it lasts a fairly long time, and his companions will keep hitting you while he runs off to get a different weapon. He comes back with two weapons after his first stomp.
I recommend detailing one fighter to keep Mr. Smite busy while your party concentrates on taking out his buddies first. We didn't do that, and we got wiped. From previous experience, however, I know that he has at least one more Stomp in him before he goes down; he'll come back with a two-handed weapon for the Final Round.
Alas, my report on this venture to the Deadmines ends here, because Blizzard rebooted the server shortly after Mr. Smite and his cronies wiped us out (that's why we were in a hurry).

No comments:
Post a Comment